Menu
0 Cart

Contact Us
freight truck
Find Order

My Account

Pool Filter Showdown: Sand, Cartridge or DE?


A filter in a pool ecosystem


Pool filters are a crucial component of your pool system, maintaining the water's cleanliness and safety for swimmers. While your sanitizer (usually chlorine) kills bacteria and other contaminants, the filter is responsible for removing them from the water. Without a filter, your pool would become cloudy and filled with dead bacteria and debris, which is neither fun nor safe. Your filter should trap contaminants, be easy to clean and maintain, and last a long time in your pool's ecosystem.

Before choosing a pool filter, it's essential to understand your options. There are three main types: sand filters, cartridge filters, and D.E. (Diatomaceous Earth) filters. They're named after the type of filter media they use to remove contaminants. The choice of filter affects several factors, including cost, filtration speed, and the frequency of cleaning or replacement.

What Pool Filters Do and Why They Matter

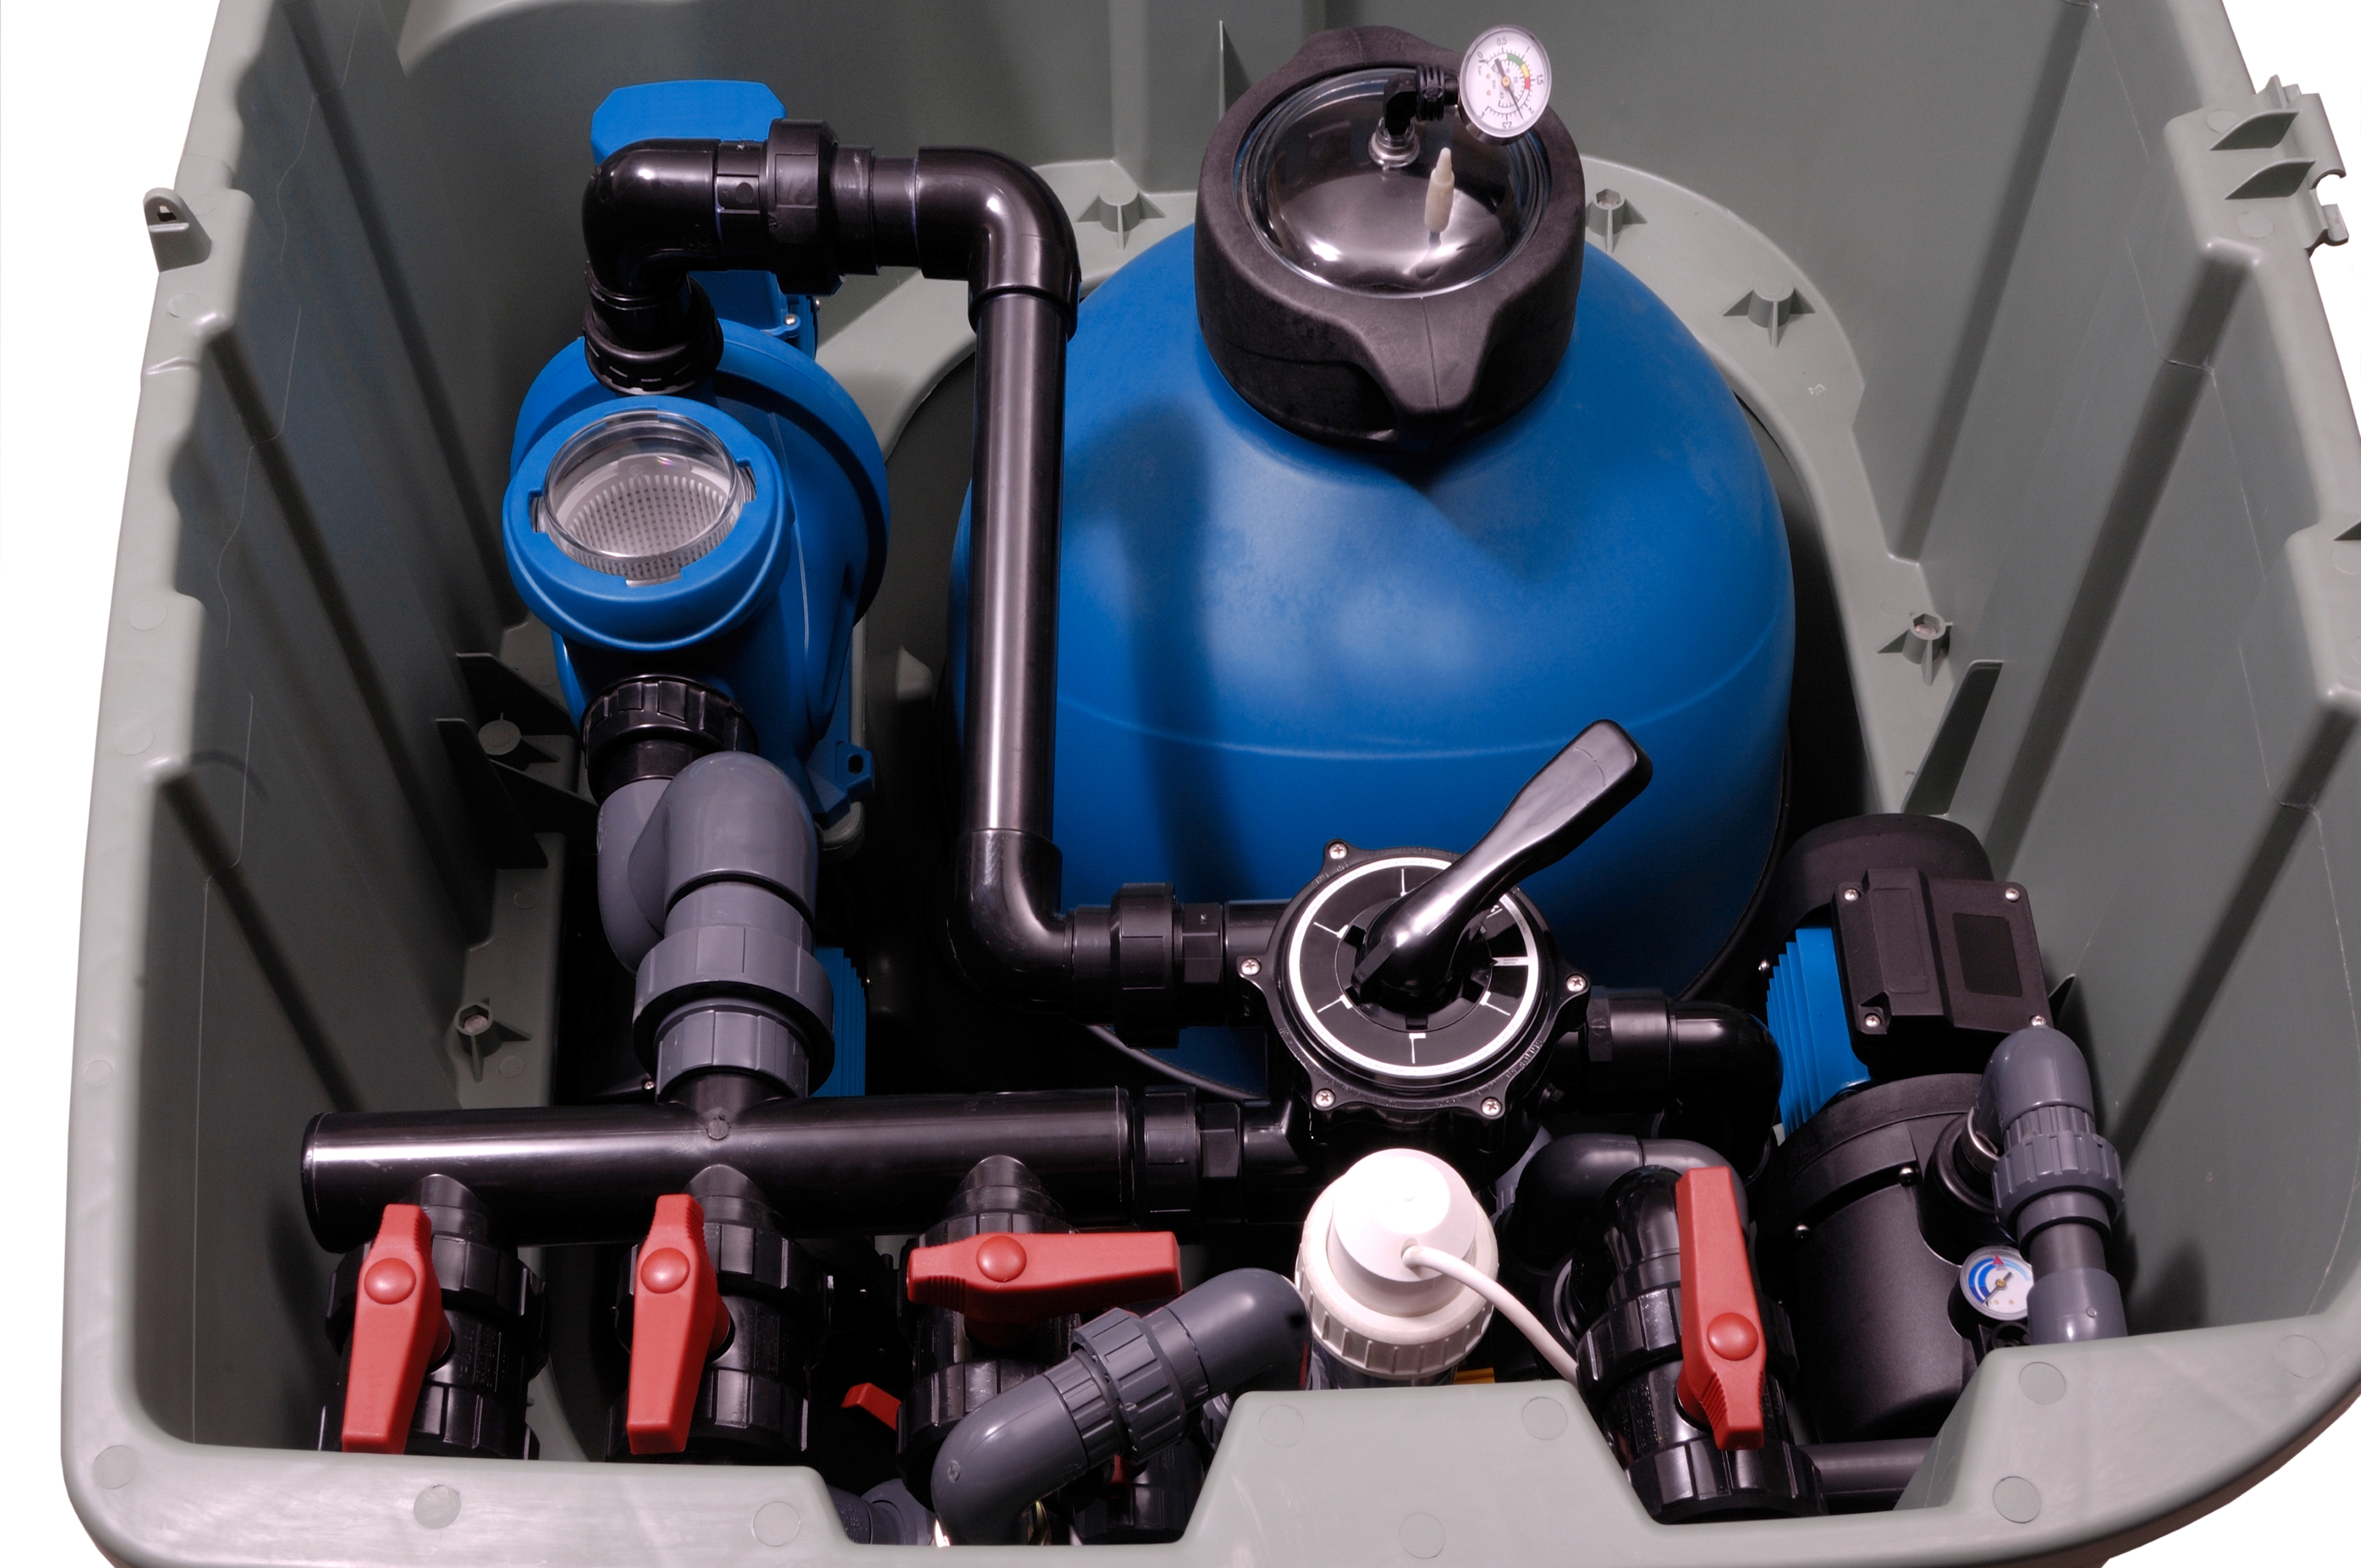
A pool filter is part of your pool's plumbing system. As water passes through it, it removes dirt and debris, producing clean, filtered water. Dirty water enters the filter, passes through the filter medium, and clean water flows back into your pool. Most people operate their filters for 6-12 hours daily, depending on the filter type and the frequency of pool use.

They are rated (or sized) in two ways: the filter rate and the filter area. The filter rate indicates the number of gallons of water that can be filtered per minute (GPM) and is matched to or exceeds the flow rate of your pump. The filter area's measurement refers to the total surface area of the filter media that is exposed to pool water, typically measured in square feet.

Things that your filter removes include:

  • Windblown dirt and debris
  • Contaminated water
  • Bugs
  • Human debris (such as skin cells, hair, and body oils)
  • Cosmetics (such as sun lotions, lipstick, and hair products)

Sand Filters

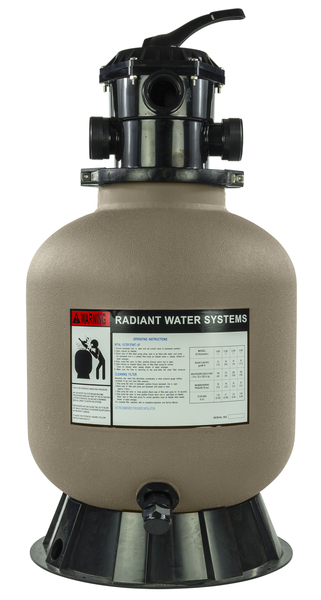
Sand filters work by circulating water through a large tank filled with sand. The typical sand used in sand filters is #20 silica sand, which captures particles that are 20 microns and larger in diameter.

The sand starts with rough edges, which help it grab contaminants and debris that pass through the filter. However, the more water that flows through, the smoother those edges become until they can no longer trap anything. Meanwhile, particles trapped within the sand accumulate, eventually blocking the water flow and reducing the filter's efficiency.

So, how do you know when it's time to clean your filter?

The built-in pressure gauge on the filter will warn you when the internal pressure increases, indicating it's time to backwash. This usually happens every 1-2 weeks or when the pressure rises 8-10 psi above normal.

Sand Filter Pros: 

  • Easier Maintenance
  • Sand lasts 5-7 years before needing to be changed
  • Efficiency can be boosted with additives and alternative media

Sand Filter Cons:

  • 20-micron filtration is the least effective of the three types
  • Backwashing and rinsing wastewater affect your chemical balance
  • Higher pressure decreases filter efficiency

Cartridge Filters

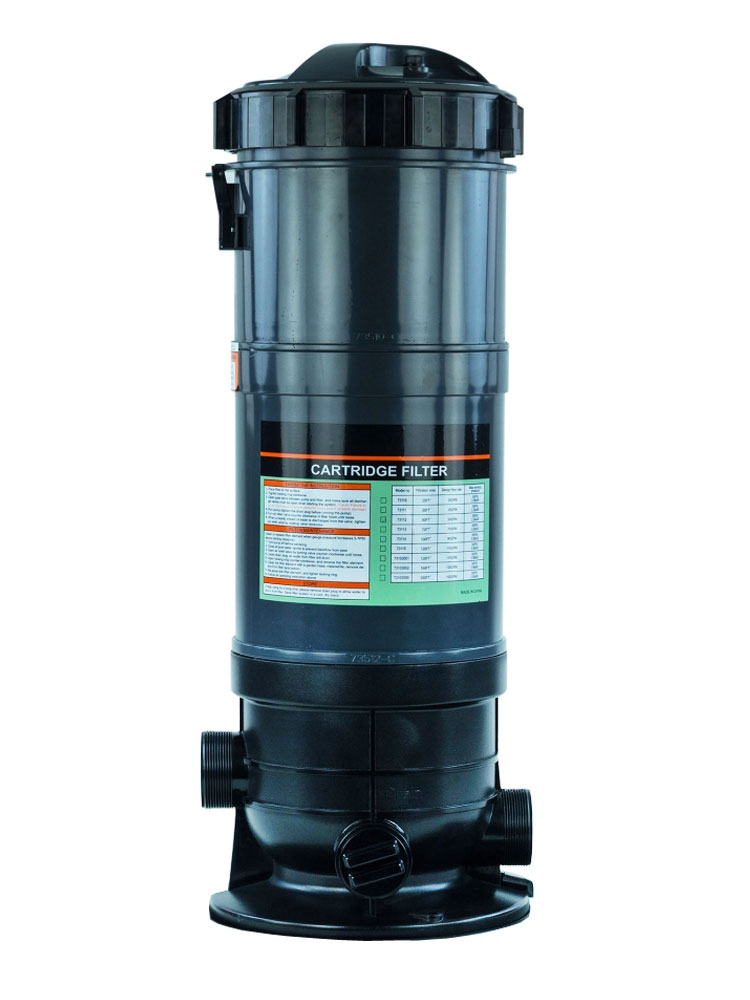
Cartridge filters are as easy to maintain as sand filters, and if you have a small pool, they're more effective. Inside the tank, there's a plastic cylinder surrounded by pleated polyester filter media, capped on both ends. Water flows into the tank and then through the pleats, capturing debris as small as 10 microns before returning to the pool.

Just like sand filters, cartridge filters require cleaning, but the process is different. Instead of backwashing, you simply remove the cartridge from the tank and spray it down with a hose to remove debris and dirt. Occasionally, you can spray it with a filter cleaner or soak it in the cleaner if it's dirty.

Cartridge Filter Pros:

  • Removes smaller particles than a sand filter
  • Has a low impact on water chemistry
  • Has a larger surface area that screens more particles
  • Requires a simple maintenance schedule, without backwashing
  • Causes less wear and tear on the pool equipment

Cartridge Filter Cons:

  • It may not be practical for larger pools
  • Cartridges need to be replaced more often than sand
  • Replacement particles must exactly match the filter's specifications

Diatomaceous Earth Filters

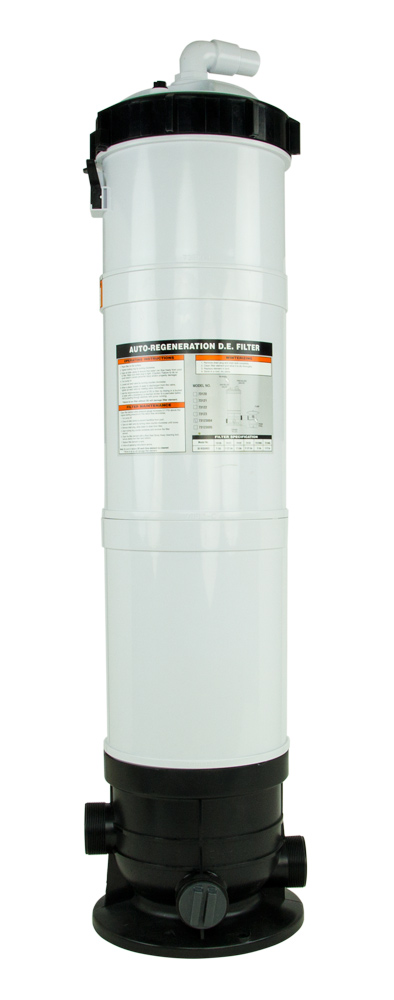
Diatomaceous Earth, or D.E. filters, are the most expensive and maintenance-heavy option, but they do filter the smallest particles of all three filter types - 2-5 microns. D.E. filter tanks contain grids, sometimes referred to as "fingers", that are covered in diatomaceous earth. D.E. is a crumbly, white powder made from the crushed fossilized remains of tiny aquatic organisms called diatoms, which is heat-treated to serve as a filtration media. The powder is easy to find and is sold at most pool and hardware stores. The pressure gauge on the tank indicates when it's time to clean your D.E. filter, and they are backwashed in the same way.

You'll need to add more D.E. powder after each cleaning. It can be hard to determine how much to add; it's especially important to disassemble and clean the filter by hand at least once a year.

D.E. Filter Pros:

  • Filter contaminants as small as 5 microns
  • D.E. Powder is easy to add through the pool skimmer
  • No caustic chemicals are required for cleaning

D.E. Filter Cons:

  • Annual cleaning requires a lot of manual work
  • Grids need to be replaced every 2 to 3 years
  • Your county may restrict backwashing
  • DE powder can be harmful if inhaled

Side by Side Comparison Table

Feature
Sand
Cartridge
DE
Filtration (Microns)
20-40
10-15
2-5
Price Range
$
$$
$$$
Maintenance Level
Moderate
Low
High
Water Waste
Moderate
Minimal
High
Media Lifespan
5-7 years
1-3 years
1-2 years
Ideal Use
Large pools
Smaller pools
High-clarity water

What Type Of Filter Is Best For My Pool?

The best filter for your pool depends on your specific needs, budget, and the level of maintenance you're willing to undertake. Regardless of which pool filter you choose, maintaining proper pool chemistry is crucial to extending its lifespan and ensuring optimal performance.


FAQs

How Do I Backwash A Sand Filter?

Sand filters come with a built-in pressure gauge that you should monitor and know the standard operation pressure. If the pressure increases by 8-10 PSI or if you notice a weak flow of water out of your pool return jets, then it's time to backwash your filter.

  1. Turn the filter system off. Now is also the time to remove the skimmer basket and any debris it has collected.
  2. Attach the backwash hose to the filter waste port (which may also be markes as the waste line or backwash port). Soon, a lot of water will flow out of this, so be sure that the other end of the hose is in an appropriate spot!
  3. Before turning your filter system back on, turn your multiport valve to the backwash position. 
  4. Let the water run until it runs clear, which should take about a minute. If your filter has a sight glass, you can check it, or you can inspect the water quality coming out of the end of the backwash valve.
  5. Turn your filter system off and turn the valve from backwash to rinse (or if you don't have a rinse setting, use the waste setting). This will help remove sand from your lines before the water flows back into your pool, taking the sand with it.
  6. Turn your filter system back on and rinse for about 30 seconds.
  7. Turn the filter system off and return the multiport valve to the filter setting. Then, turn the whole system back on and run it as usual.
  8. Refill, test, and balance your pool water as necessary. Since you've removed water from your pool, the chemicals will need to be rebalanced.

How Do I Change The Sand In My Pool Filter?

  1. Turn off the filter and the pump, ensuring the timer isn't set to turn them on while everything is disconnected. Remove the drain plug from the bottom of the filter tank and let all the water drain out. Be aware that this may take some time.
  2. Remove the hoses or pipes connected to your multiport valve. Use a screwdriver to remove the clamp or collar securing the valve to the tank, then gently remove the valve.
  3. Inside your tank, you will see an open pipe from which you just removed the valve. Cover this with duct tape to prevent sand from getting inside, only to be flushed into your pool late.
  4. Use a shop vac to suck out all the old sand. Although this can be done by hand, using a shop vac is much quicker and easier.
  5. When enough sand has been removed that you can see the arms branching out of the standpipe,, use your garden hose to rinse any remaining sand out of the drain hole. Then, use the flashlight to carefully inspect the inside of your tank, including the standpipe and laterals. If there's any damage, now is the time to repair it.
  6. Replace the drain plug in the tank before filling it up halfwat. Center the standpipe and laterals, and hold them in place while the tank filles. This helps create a cushion to protect the laterals from the weight of the falling sand.
  7. Before adding the new sand to the filter, wear a mask to prevent breathing in dust. Add one bag of sand at a time, slowly pouring it into the tank so it won't spill everywhere.
  8. When all the sand is in the tank, fill it with water. Replace the multi-port valve, collar, and pipes or hoses, ensuring all the fittings are secure.
  9. Backwash and rinse your filter as usual.

How Much Sand Do I Need In My Pool Filter?

Unfortunately, there's no one answer for this. To know how much sand you need for your pool filter, you'll need to see the filter's specifications - typically it's diameter. Generally, you want to fill your filter about 65%-75% of its capacity with sand.

Can I Switch From A Sand Filter To A Cartridge Filter?

Yes, but you may need to adjust the plumbing of your pool, or purchase a new filter housing.

How Do I Clean A Cartridge Filter?

Just as with a sand filter, you should monitor your pressure gauge and be aware of the standard operating pressure. When the pressure increases by 8-10 PSI, or the returning flow of water to your pool is weak, it's time to clean the filter.

  1. Turn off your pool filter and remove any excess air from the system by slowly opening the air relief (usually located on the top of the filter).
  2. Remove the top of the filter before slowly and carefully removing the cartridges and setting them aside. This is also a good time to inspect everything for damage and wear. If there are any cracks or tears, it's time to replace the filter.
  3. Clean the cartridge using a spray nozzle on your garden hose to get between the pleats. We recommend using a cartridge cleaning brush that connects to your garden hose to really clean between the pleats.
  4. If your filter is dirty, you can use a filter cartridge cleaner, either by spraying down the cartridge or, if it's extremely dirty, by soaking it overnight.
  5. Check the filter tank O-ring. If it's in good shape, gently apply dome lubricant to keep it that way for longer. If it's dried, rotted, deformed, stretched, or otherwise appears worn out, then replace it.
  6. Return the cartridges to the filter and secure them in place. Replace the filter top and tighten the clamp or assembly. Ensure your air-relief valve remains open to release any excess air in the system.
  7. Turn the system back on, keep the valve open until a steady stream of water flows from it, and then close the valve. Check to ensure the system pressure is back in the normal range.

What's The Most Low Maintenance Filter?

Cartridge filters are typically the easiest to care for.

Which Filter Is Best For An Above Ground Pool?

Cartridge filters are a popular choice due to their compact size and efficiency.

How Do I Know When My Filter Needs Replacing?

Increased pressure, reduced flow, or visible wear on cartridges or media are signs that it's time to replace your filter.


Greg The Pool Guy Equipment